Drawing Watch Hands and Sending Resources
Drawing a Proper Watch Hand
First step in having your own watch face is designing the hands.
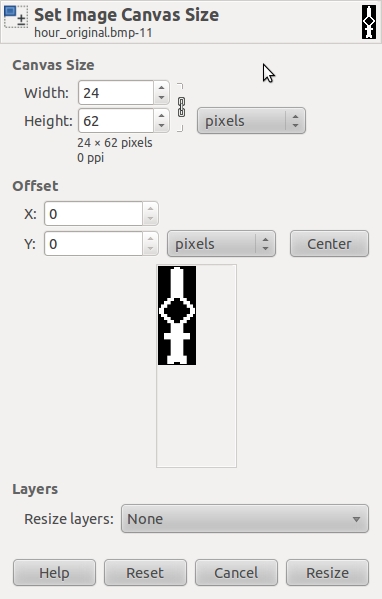
You will then have to change the canvas size to double what it currently is. In this case, the hand would fit perfectly in a 12x31 rectangle, so we make it 24x62.
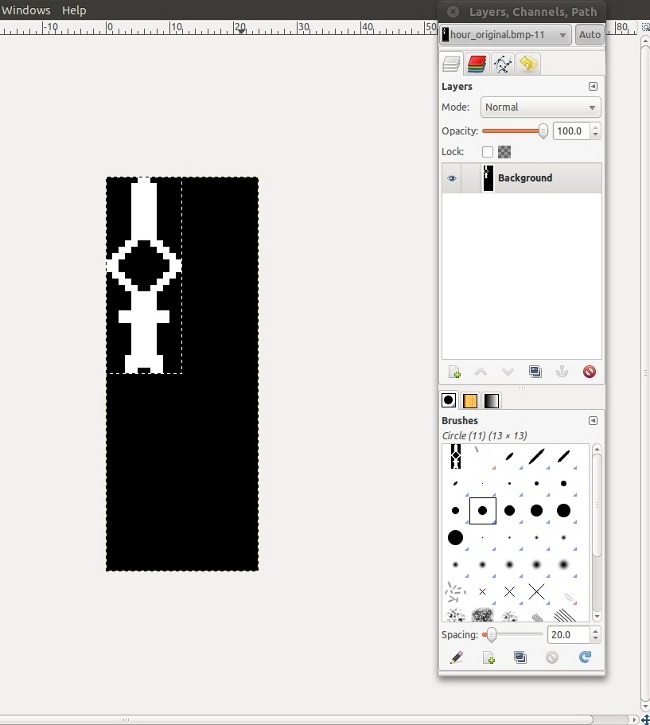
You will then have to color the rest of the image in black, as it will probably be either transparent or white from the canvas resize.
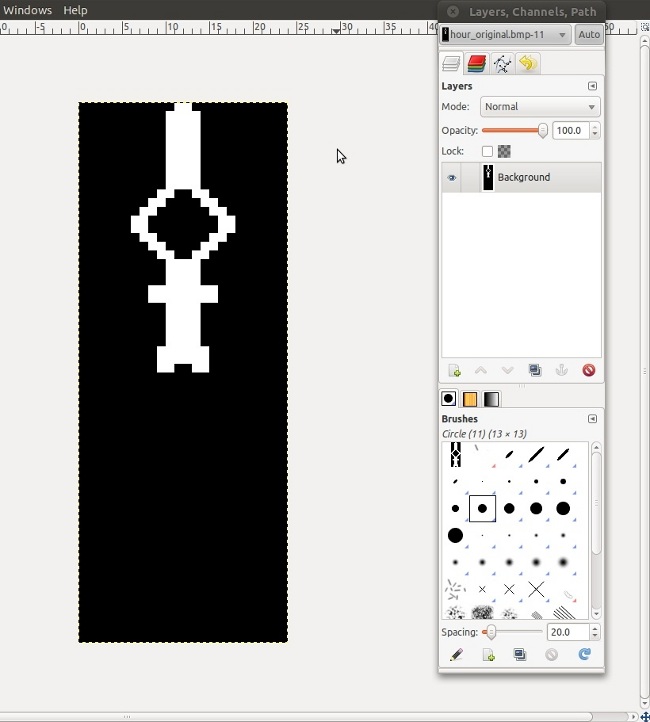
You then have to shift the actual arrow to the vertical middle of the canvas. At the end, the file should be saved as hour_original.bmp or minute_original.bmp depending on which hand you just designed.
Setting up the Resources
In order to generate the proper resources for a new watch face, your resources folder should look like in the image below with the 2 original source images in the source_images folder.
From the resources folder, you will have to run:
| python py_rotate_hand_image.py |
At this point, your resources folder should look similar to the one below. In it you should have 12 photos of the hour hand through its different angles, and 60 photos of the minute hand through its different angles.
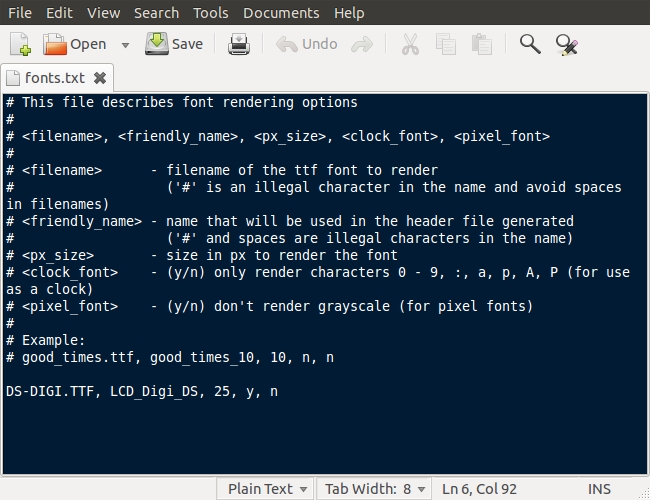
Now it’s time to edit the font file, in order to properly render the font. The first parameter in the file is the actual name of the file in your resource folder. The second parameter is the name you will want your font to have when in the resource header file that will be created in a few steps. The third parameter is the size of the font. As all fonts look different at different sizes, it is good to create copies of the same font, but of different sizes. To do this, all you will have to do is give it a different friendly name and a different px size. The fourth parameter determines whether the font will be used only as a watch, in which case any non-essential characters will not be rendered. The final parameter will determine if the font is a pixel font.
At this point you will need to pack everything, font and images together, so from the pulse_sdk root folder, you will have to run:
| python tools/resource_packer/resource_packer.py |
It is also through this command that the header file is created and added in the include folder.
After running the command above, you will notice that a new file was created in the resources folder: inpulse_resources.bin
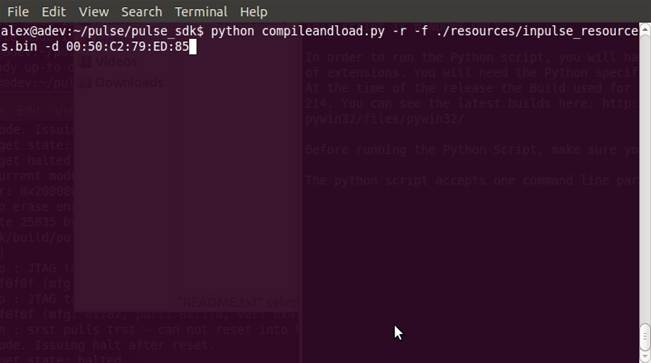
Now we will be sending these resources to the watch. Unless modified, the resources only need to be sent once. To send the resources the following command is entered from pulse_sdk folder:
| python compileandload.py –r –f ./resources/inpulse_resources.bin –d aa:aa:aa:aa:aa:aa |
Where aa:aa:aa:aa:aa:aa is the “bd adder”. In order to find it for your particular platform, please check its “Getting Started” guide.
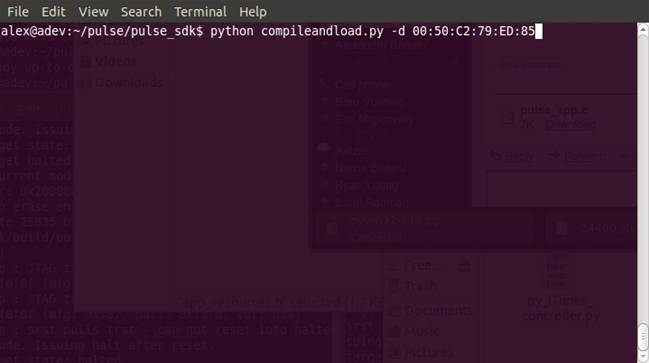
The next command will compile and load the actual code on your watch. You will notice it’s very similar to the above.
| python compileandload.py –d aa:aa:aa:aa:aa:aa |
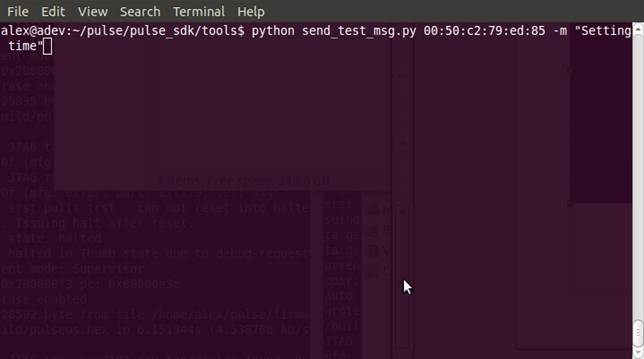
To send a test message, and in the watches case to set the time, you will have to run the following command from the tools folder inside the pulse_sdk root folder. The string passed along can be anything. In order to set time, the string can be anything, not necessarily “Setting time”.
| python send_test_msg.py aa:aa:aa:aa:aa:aa –m “Setting time” |